How to: Obtain a ServiceNow Developer Instance and Configure API Integration
April 14, 2020 1 Comment
ServiceNow Developer instances are great to help you learn more about ServiceNow, test functionality, or just try to break it. These SaaS instances power up very quickly, and you have the ability to wipe them and start over anytime you’d like. I want to show you how easy it is to obtain a developer instance of ServiceNow and start kicking the tires. And since most of my articles will focus on automation, we’ll include the (basic) configuration for API integration to SerivceNow.
For anyone in the ServiceNow community, this article will be a no-brainer. For many of my blog followers, this will be new territory and is essential for following along in some of my upcoming articles.
Create an account to obtain a developer instance
- Navigate to https://developer.servicenow.com/ and select Create an Account.
- Walkthrough the ServiceNow registration steps
- Once you have registered, log in to https://developer.servicenow.com/ and select Request an Instance.
- ServiceNow release versions are named after cities, in alphabetical order. So as you can see in Figure 1, you can choose from Madrid, New York, and Orlando. Orlando is the latest release. Choose the latest release available to you and select Request.

- Normally when you choose the latest release and select Request, your instance will be available in a matter of seconds!!! You’ll receive a notification as shown in Figure 2.
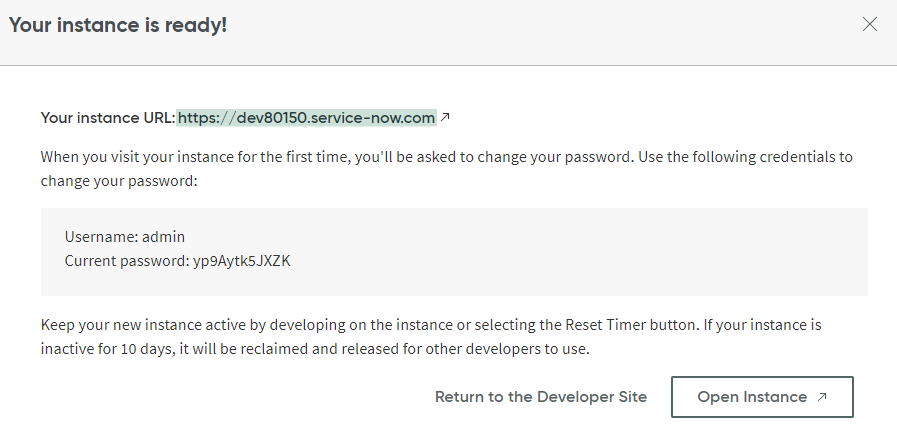
- Take note of your instance URL and admin password, and then select Open Instance to launch the ServiceNow instance. (Also note that the instance is reclaimed after 10 days of inactivity).
- On the first login, you’ll be prompted to change your password. Take care of that, and then you will see the ServiceNow home page, as shown in Figure 3. *Note this is the administrator view.

- Congrats! You have a developer instance of ServiceNow!
Create a Service Account for API Access
Now that we have an instance, we need to create a new user to be used as the service account for API access. For this example, we will enable basic access and authentication. For a production deployment, work with your ServiceNow team for a more secure method (such as OAuth).
- In the left-hand navigation, type ‘users’ and then navigate to System Security->Users and Groups->Users, as shown in Figure 4.
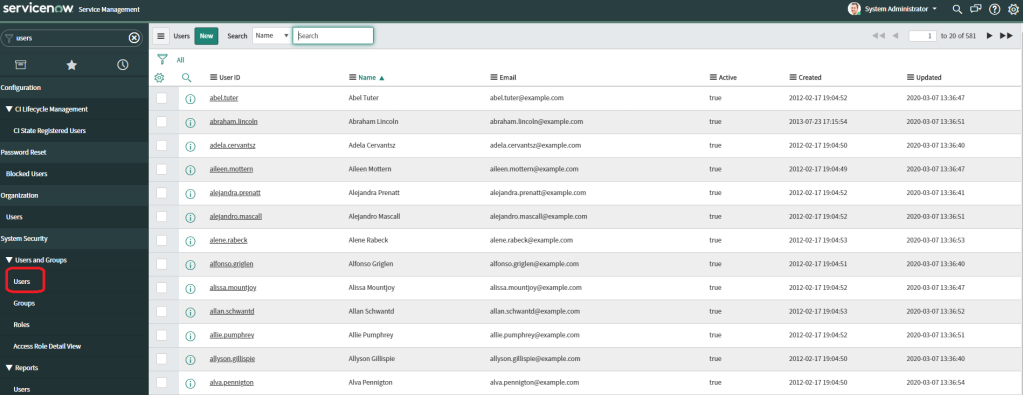
- As you can see in Figure 4, the developer instance includes sample data. Click New to create a new user. Populate the user information, similar to Figure 5, enter a password and select Submit.
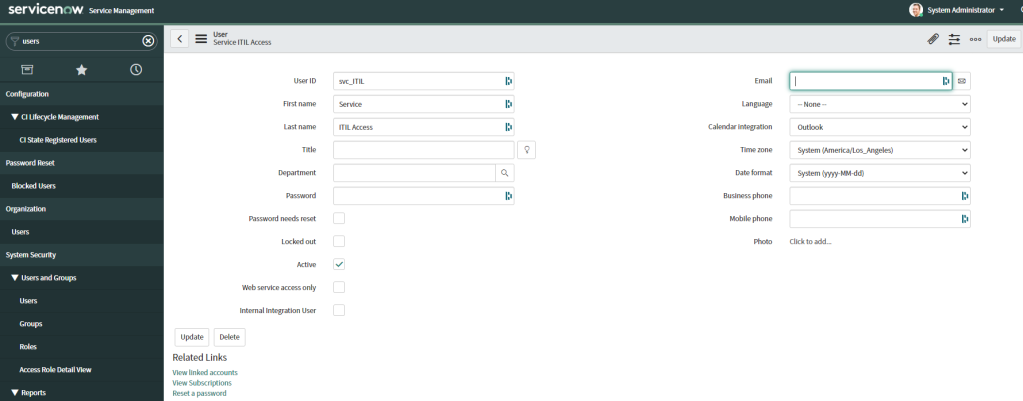
- Next, select that record to open it back to the detail view, select the Roles tab and click Edit as shown in Figure 5.

- From the Edit Members page, grant the following roles: itil, and snc_platform_rest_api_access as shown in Figure 7. This will give your service account enough rights to Create/modify incidents, requests, and perform other ITIL functions. Be sure to restrict service account access as much as possible for your production scenario.
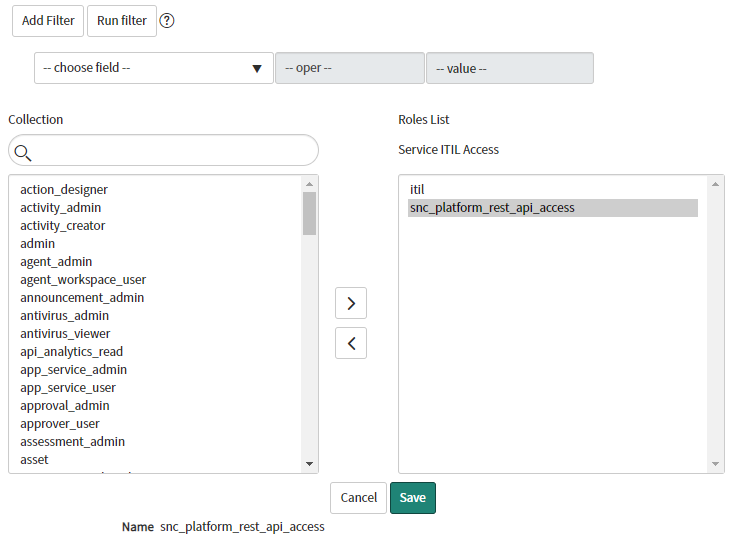
- Click to Save changes.
Test API Access using PowerShell
Read Test
Now it’s time to test! You could use Postman or any API testing tool, but we’ll use PowerShell here. Use this sample code:
$cred = Get-Credential
$results = Invoke-WebRequest -Uri "https://dev80150.service-now.com/api/now/table/alm_asset?sysparm_limit=1" -Method Get -Credential $cred
($results.content | ConvertFrom-Json).Result
When run, this code will prompt for credentials (enter the credentials you created with the service account), and then query your ServiceNow Developer instance and return one result (sysparm_limit=1).
Write Test
Now let’s do a quick write test to ensure it’s working as desired. This example will create a (very) basic incident:
$cred = Get-Credential
$body = @"
{
    "short_description":"Loud Fan on notebook"
}
"@

$results = Invoke-WebRequest -Uri "https://dev80150.service-now.com/api/now/table/incident" -Method Post -Credential $cred -body $body  -Headers @{'Content-Type' = 'application/json; charset=utf-8'}

($results.content | ConvertFrom-Json).Result
You can also see the created incident number in the returned result.
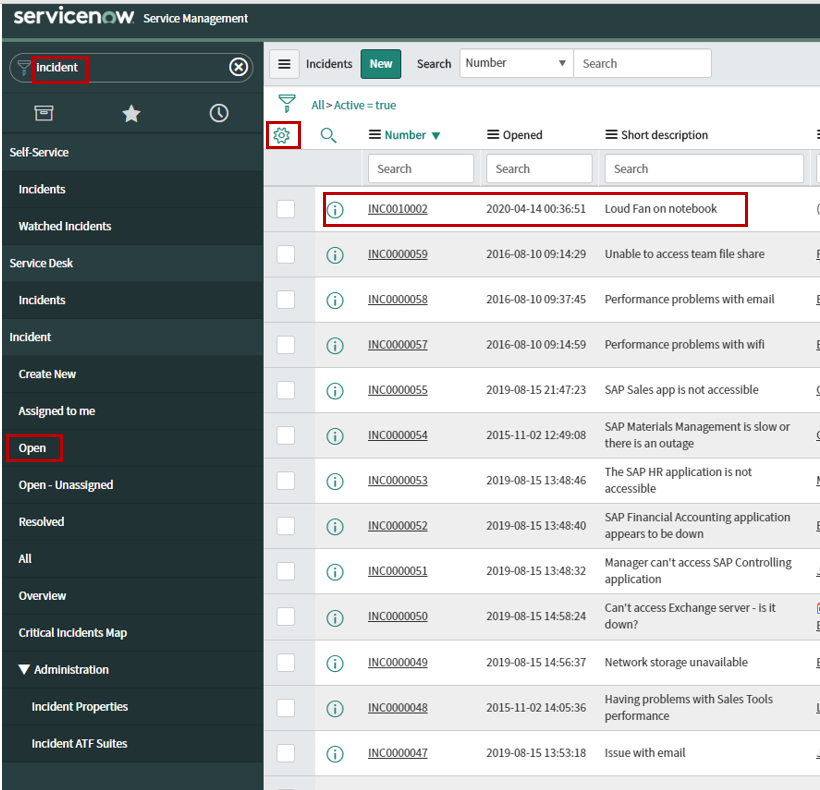
- From ServiceNow, type Incident in the top-left search bar, as shown in Figure 8.
- Next select Open under Incident.
- Click on the gear icon to select/re-order columns.
- Your newly-created incident should appear at the top of the list (if not, click on Number to re-sort.
This is a basic example of creating an incident that is only here for you to verify connectivity. I have found that many applications advertise they integrate with ServiceNow, and while true, the integration they support could only be used in a lab environment. Most business processes will require more information than the minimum required fields for ServiceNow. The challenge is that every company/business process requires different fields and data for things such as an incident. My recommendation to anyone who wants to integrate with ServiceNow is to also have an advanced option, where I (as an automation admin) can provide a JSON of the fields that I want to pass from the 3rd party application to ServiceNow. This is not a one size fits all world.
Congrats! You now have a ServiceNow instance that you can successfully query and create items! Stay tuned for how we will leverage this instance in future articles. Take advantage of the REST API Explorer and start to do some amazing things.
Greg
Pingback: Updating ServiceNow with Hardware Asset Data using Logic Apps | Greg's Systems Management Blog