How To: Use Logic Apps to Query Intune for Device Information
April 7, 2020 1 Comment
This article will show you how to query device information from Intune using Logic Apps. This is a foundational article and will be used in several other scenarios going forward.
Why?
Why would we want to do this? The simple (and vague) answer is ‘for many types of process automation.” I’m currently building a scenario to show you how to use this process to create/update an asset record in CMDB. In a few weeks, we’ll dive into other scenarios where we also need device information from Intune.
Following are the basic steps for this article:
- Create an Application Registration and grant read-only access.
- Build a sample Logic App to query Intune (via Graph) and send an email with the details.
This article will lay the groundwork-You’ll see this better in action when we incorporate it into the scenarios mentioned above.
Prerequisites
In order to accomplish this task, you must have Intune with managed devices, as well as access to Azure AD to grant rights.
Create an Azure Application Registration
In order for Logic Apps to query Graph, we must register an application and grant read rights to Intune.
Registering an Application in Azure
- In the Azure portal, navigate to Azure Active Directory and select App Registrations.
- Select New registration.
- Enter the Name as Intune Get Device
- Review the settings shown in Figure 1 and click Register.

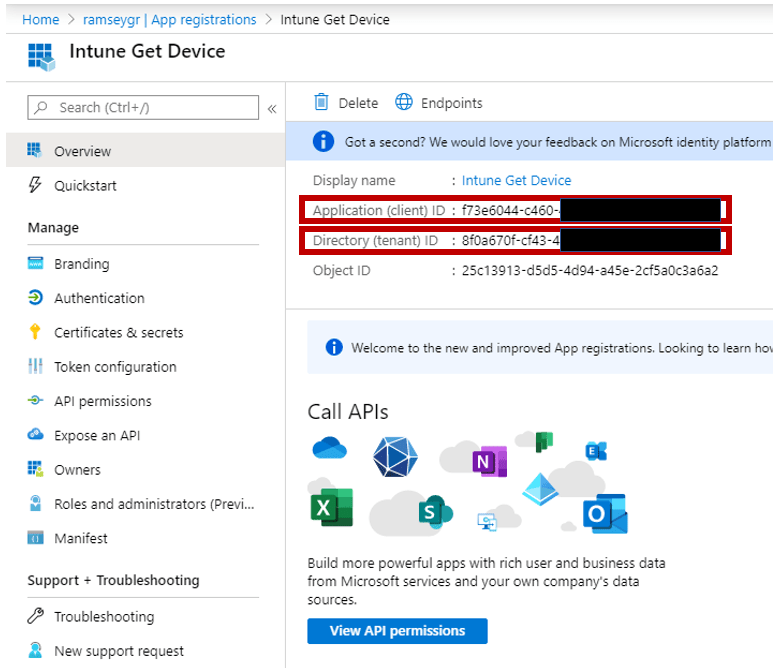
- After clicking Register, you should now see a page similar to Figure 2, which shows the details of your new application registration. Copy the Application (client) ID and the Directory (tenant) ID, as you will need them when we create the Logic App.
Congrats! you’ve registered a pretty boring application (so far). Now we need to grant API Permissions:
Granting Read Rights to Intune
- Click on View API permissions
- Click Add a permission
- Select Microsoft Graph as shown in Figure 3.

- After selecting Microsoft Graph, you are prompted for the type of permissions your application requires. Select Application Permissions as shown in Figure 4.
- Type DeviceManagement in the text box to filter the list, then choose DeviceManagementManagedDevices.Read.All as shown in Figure 4, then click Add permissions.

- Next, you (as an administrator) must grant consent for the specified rights. Click the Grant admin consent for … button as shown in Figure 5.
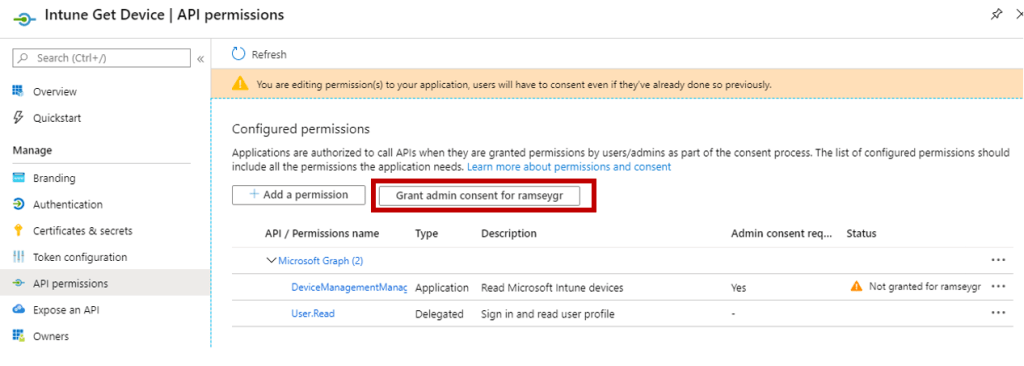
- Click Yes in the confirmation dialog to grant consent. The result should be similar to Figure 6.

- Next, click on Certificates & secrets and click New client secret.
- Enter a clever description and set the secret expiration time as shown in Figure 7, and then click Add.

- Under Client secrets, you should see the description and the secret value as shown in Figure 8. Copy this secret value and store it securely for use in your Logic App.

Create a Test Logic App
Finally, we are ready to roll from an application registration perspective. Next, we create a test logic App to verify that all is well.
- From the Azure Portal select Logic Apps, then Add.
- Choose your desired Resource Group, enter the name “Test-GetIntuneDevice”, and choose a location.
- Click Review + Create, and then Create.
- Once created, go to your new Logic Apps resource.
- For this test, select Recurrence as the common trigger as shown in Figure 9.
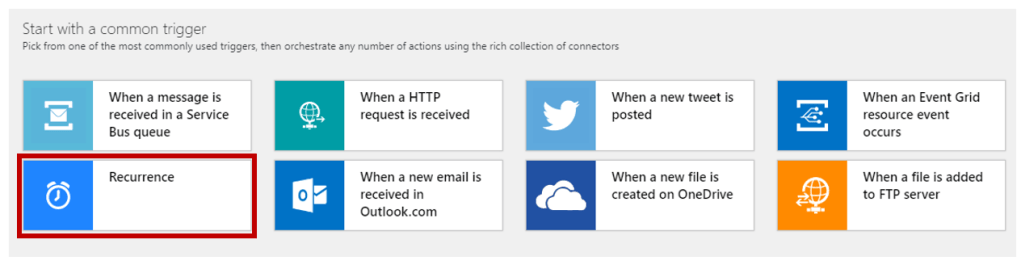
- Set the Interval to 3 and the Frequency to “Month”, so that this runs every three months (once we’ve tested, we’ll delete this test Logic App).
- Create a new step and search for “initialize”, then choose Initialize variable as shown in Figure 10.

- Enter “ComputerName” for Name, set the Type as “String” and for the value, set it to an existing computer name in Intune as shown in Figure 11.

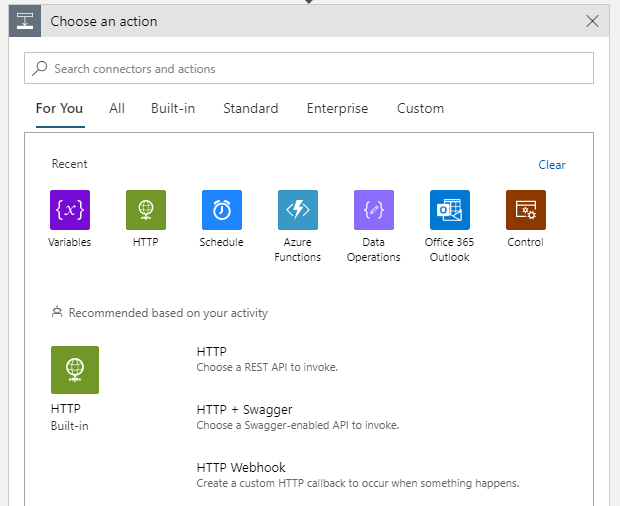
- Next, create a new step, then search for and choose HTTP as shown in Figure 12.
- Choose Get for the type
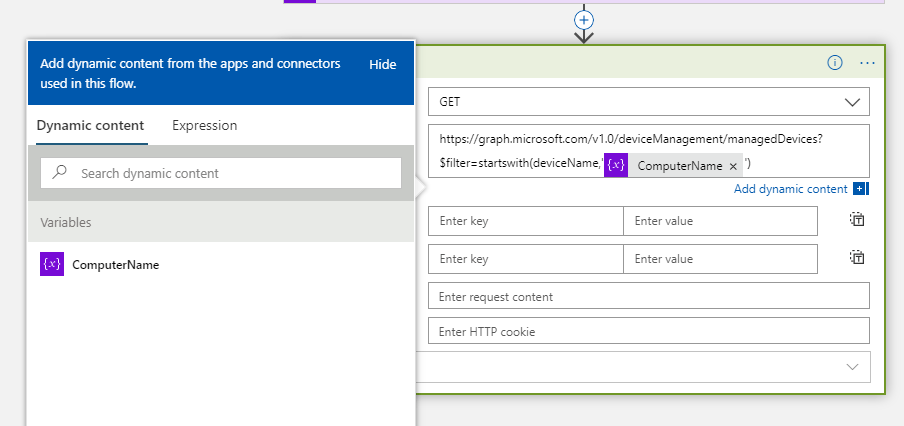
- For the URI, enter the following: https:// graph.microsoft.com/v1.0/deviceManagement/managedDevices?$filter=startswith(deviceName,””) Next, insert your cursor between the single quotes near the end of the line and select the ComputerName variable under Dynamic content as shown in Figure 13. Also please note that you may need to remove a space between https:// and graph in that url, due to formatting issues.
This step uses the Get managedDevice API from Graph. For this example, we configured the API call to filter based on the deviceName.
- For Headers add “Content-Type” as “application/json” as shown in Figure 14.
- Click Add new parameter, select Authentication, and then click off of the dialog to add the Authentication Type to the step.
- Select Active Directory OAuth for the Authentication type.
- Add your Tenant, Client ID and Secret (the ones you copied earlier while creating the App registration).
- For Audience, enter https://graph.microsoft.com.
- Review settings and compare them to Figure 14.

Most importantly, click Save and ensure the Logic App successfully saved.
Run a Test
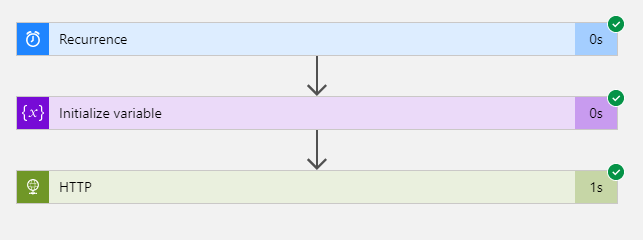
You should be set to just click Run on the Logic App, and give it a few minutes to complete. After completion, you should see green checkboxes across all three steps as shown in Figure 15.
Finish the Logic App
Now that we’ve performed a successful run, we need to complete our Logic App.
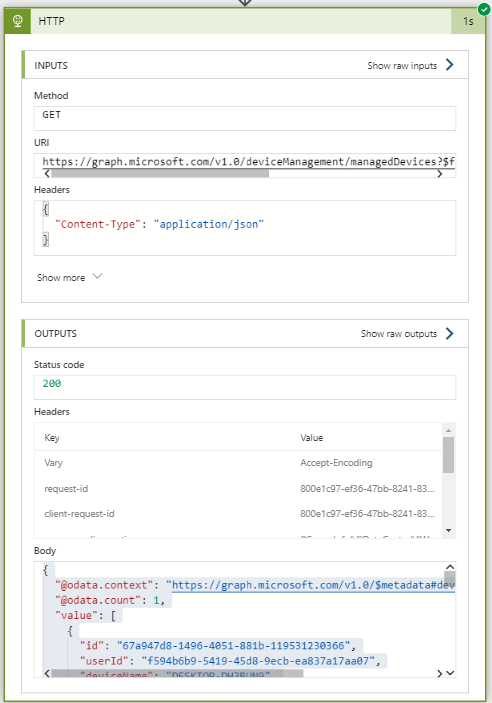
- Expand the HTTP step to view the output.
- Copy the contents of the Body as shown in Figure 16. We will use this information to provide the schema to parse the JSON.
- Next, Edit the Logic App and click New step.
- Type “Parse JSON” into the search bar and select Data Operations->Parse JSON.
- For Content, select the dynamic content of the Body from the HTTP step.
- Click Use sample payload to generate schema, paste the body that you copied in Step 2 of this section and click Done so that the Parse JSON step looks similar to Figure 17.

- Click New step and find the Send an Email(V2) step for Outlook.
- Enter the desired To email address, and a catchy Subject line.
- In the Body, Type “Device Name:” and then expand the Parse JSON dynamic content (as shown in Figure 18) and then select deviceName.
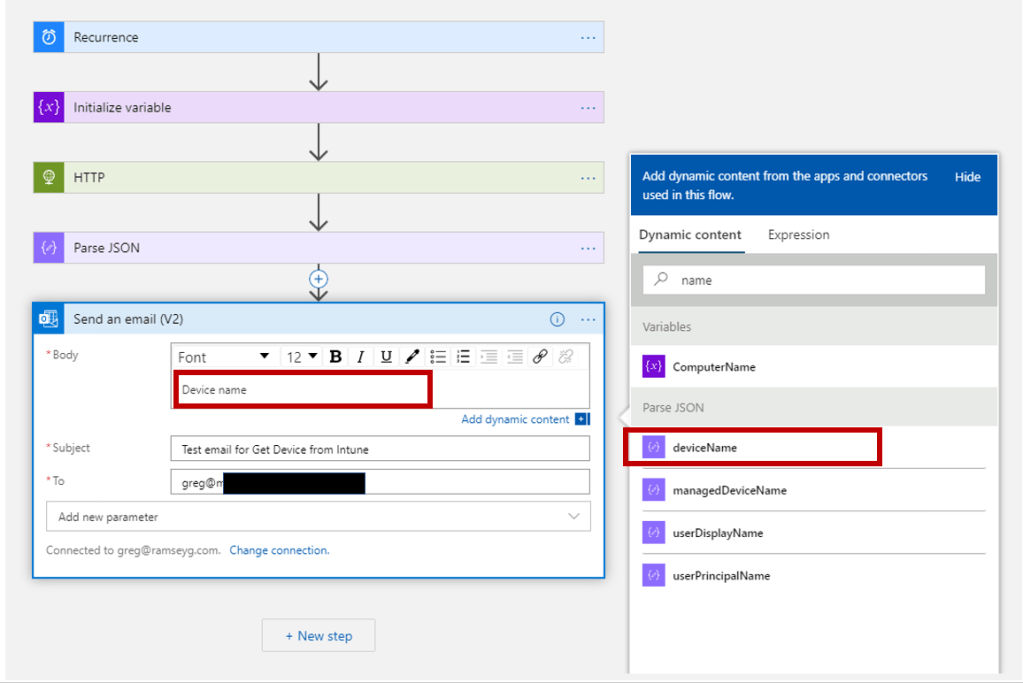
- Note that as soon as you select deviceName, the Logic App Designer realized that this is an array (based on the schema from the Parse JSON step) and automatically created a For each loop. Expand the Send and email (V2) step and populate the Body as shown in Figure 19.

- Save your work!
Perform a Full test
At this point, you should be ready for a full test. Click Run in the Logic Apps Designer and wait a few minutes to (hopefully) receive an email. You should also see the completed steps appear in the Logic Apps Designer as shown in Figure 20.

And if all worked out as planned, you also have an email in your inbox that looks similar to Figure 21.

Congrats! This is a huge step in preparing for future automation. Hopefully, this article has laid the groundwork for you to learn more about extracting data from Intune using Graph. Stay tuned for scenarios that leverage this functionality.
When finished, remove the test Logic App, but be sure to capture the secret and other information so that you can use it for future automation.
Greg

Pingback: Processing an Azure Alert with a Logic App | Greg's Systems Management Blog